Tutorial for Cartographer’s Guild
Fix the defaults
The defaults in Fractal Terrains weren’t the best choice. They were devised back when the original FT was released, back when the P2/450 was king, 512 MB was a good amount of memory, and dedicated graphics hardware was uncommon. We’ve learned a lot since then, including better world settings for FT. World settings are found by using the Map>>World Settings menu item.
Change the Fractal Function
The original FT fractal functions had some issues, the most obvious of which was a problem with “tire track” artifacts afflicting the Ridged Multifractal function. The Wilbur Ridged Multifractal function gives much better results and is also compatible with the Wilbur program in case you might have used that program..

Change the world roughness and land size
The original choice of Roughness and Land Size weren’t great at developing reasonably plausible landmasses. I like the ones shown below, but some folks prefer rougher worlds and smaller landmasses.
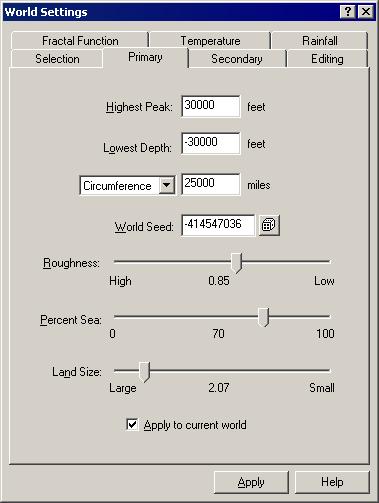
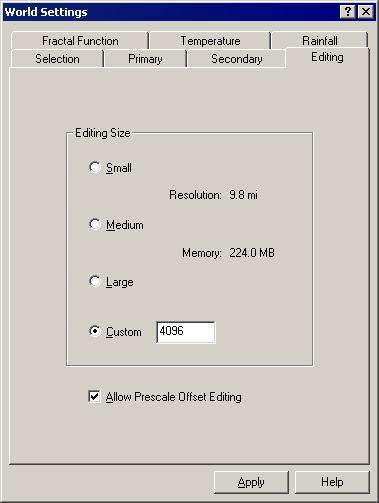
Increase the editing resolution
Modern computers tend to be fast and have lots of memory. FT was developed back when the P2/450 was king and 512 MB was a lot of memory. These days we can boost the editing resolution to make things look a little better. I’m going to go high and get 10 mi per sample editing resolution.
The default painting tools in FT work on the offset and roughness channels. While good effects can be obtained via these channels, better results can be obtained with the prescale offset channel. The tools for this aren’t on the toolbar, but it’s a minor inconvenience for the improvements in results. Note that you pay the memory cost for another editing layer, though.
Apply to the world
Apply these settings to the world and save the results to the disk. It will eat a few hundred megabytes of disk space because FT stores uncompressed data. If you want to conserve disk space or are running on a machine with limited memory than I recommend using a smaller editing size. A size of 3000 only uses 120 MB, while 2000 only uses 54 MB. The tradeoff is editing resolution, of course.
Select a world
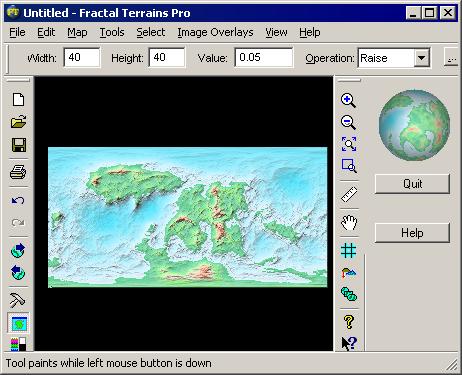
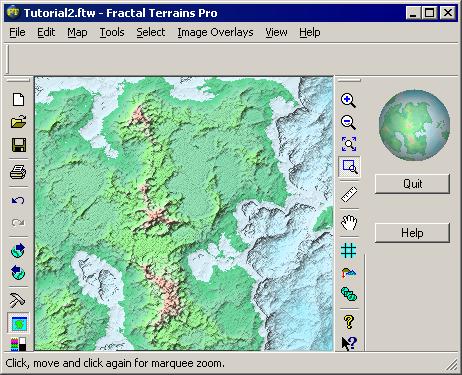
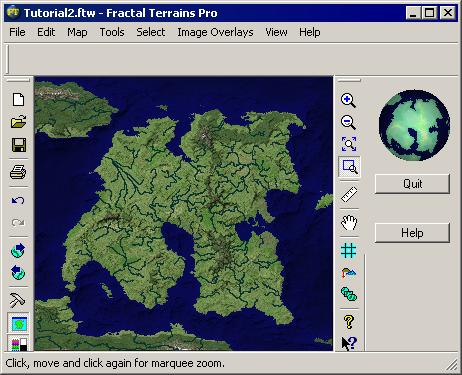
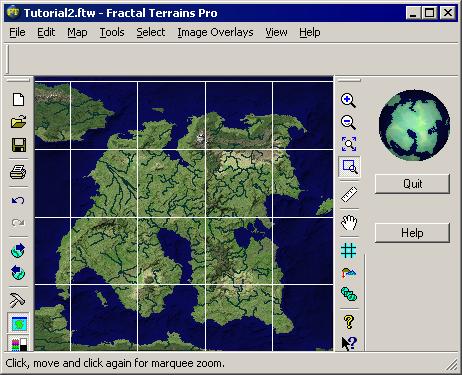
If you’re following along as shown above then your FT screen should appear as shown below:
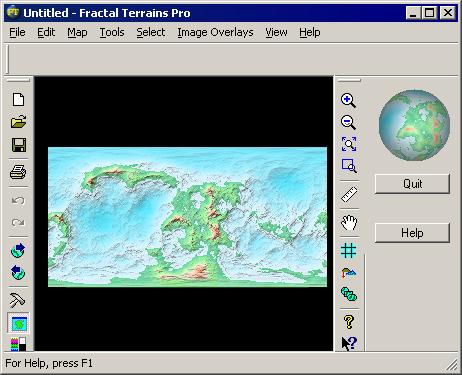
If you don’t like the way that this world looks then there are 4 billion other ones, each with many, many billions of variations. We’ll keep going with this one for now
Painting
Use the prescale offset editing tools instead of the offset editing tools
The prescale offset editing tools (Tools>>Paint Raise>>Prescale Offset and Tools>>Paint Lower>>Prescale Offset) are your friends. They aren’t on the main toolbar and that’s a shame. They are a little twitchy, so use a value of about 0.05 or 0.01 with these tools when painting.
Use a light touch
Multiple clicks in an area with a large tool and low value are much better than one click with a small tool and high value. I’m going to be using a brush between 100 and 250 pixels wide.
Painting Toys
Holding down the Shift key temporarily switches to the Pan tool to let you move around the world without having to switch tools.
The “+” key zooms in.
The “-” key zooms out.
Fill in the little potholes at sea level first
FT assumes that anything below sea level is, well, sea. FT also stops routing rivers when it hits a sea. To avoid rivers stopping at small lakes that should fill up and overflow you want to get everything that’s sea connected together. If you really want lakes at other than sea level you can always paint them in later by painting a water level high than the local land level.
Try to be a little asymmetric
In the real world, mountain ranges usually aren’t in the exact center of continents. In FT, they are. What we want to do is to expand land on one side of the mountains or the other.
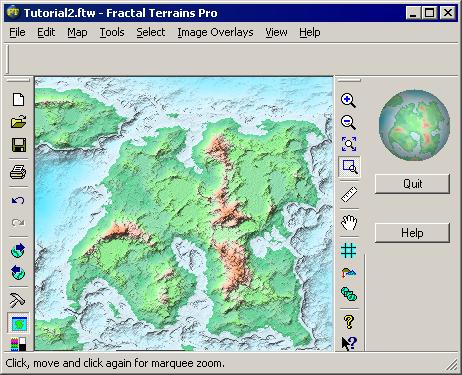
The results
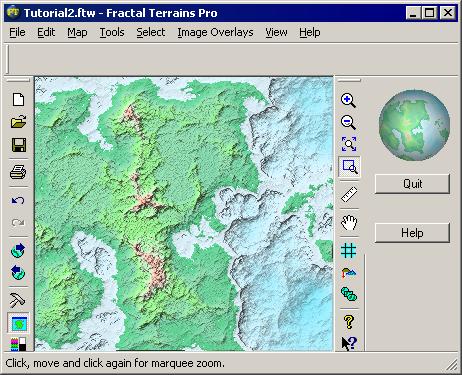
I put in about 15 minutes of painting and got the results shown below:
Smoothing the painting
Sometimes the painting is a little rough so you want to smoothing things out a trifle. Tools>>Global Smooth>>Prescale Land Offset will do this. A value of 1 will work nicely here.

Fill Basins
There are a great many little basins all over the world that will affect how rivers get routed. FT wants rivers to head to the sea so it fills in basins automagically during river routing. This process will give very straight river segments that flow down into valleys and climb back up the other side. As you might expect this result is not correct. Filling the basins yourself will give a little rougher result and gives better river results.
Tools>>Actions>>Fill Basins in Offset gives the following result:
Smoothing the Basins
The edges of the basins are a little too harsh so smoothing is required. The Fill Basins in Offset operation generates its results in the Offset channel rather than the Prescale Offset channel, so the required operation is Tools>>Global Smooth>> Land Offset with a value of 1 fixes much of the problem.
Incise flow
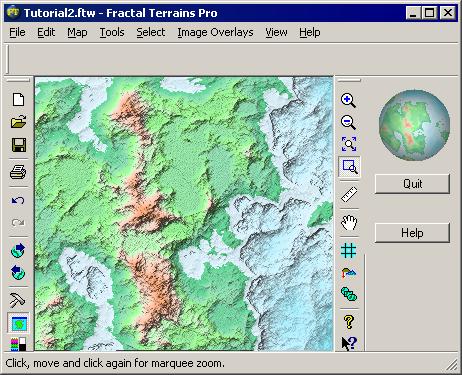
The mountains look more like rough lumps or clouds than they do mountains. Mountains have erosional features. To that end, we apply Tools>>Actions>>Incise Flow with the following settings
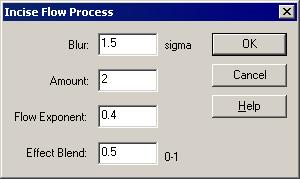
to get this result
Fill basins again
The incise operation may have introduced little pits. Fill them again with Tools>>Actions>>Fill Basins in Offset.

Smooth the Result
A lot of smoothing happens, doesn’t it? Tools>>Global Smooth>>Land Offset with a value of about 2 ought to do it.
Make Rivers
Tools>>Rivers>>Find Rivers will find rivers. I’m using a fine grid because I don’t want to wait a very long time.

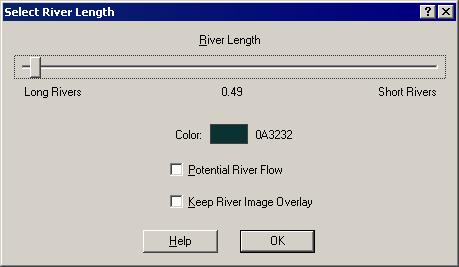
After the flow for the world has been computed you get to play with the river length slider. Medium-long ought to do it. Note that the river color will be fixed forever so pick a darkish blue color. You can get the Windows RGB color picker by holding down the Shift key when picking a color or the CC2 color picker by not holding down the Shift key.
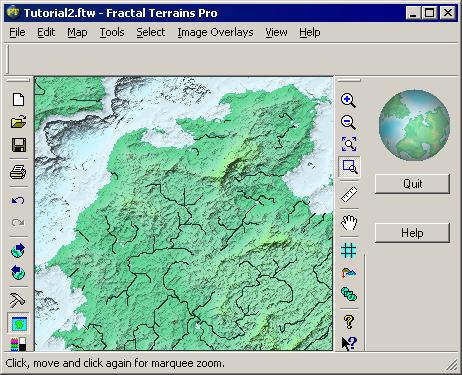
Look for River and Editing Errors
It sometimes happens that you miss a small hole in the terrain and rivers stop in the wrong place. We have exactly this situation on the upper-left corner of the continent:
Do more painting, basin filling, smoothing, etc. until the things are fixed, then run rivers again.

Change Sea Color
Map>>Lighting and Color brings up the lighting and color page. Set the sea level sea color to the river color that you used and the deep sea color to a darker color.
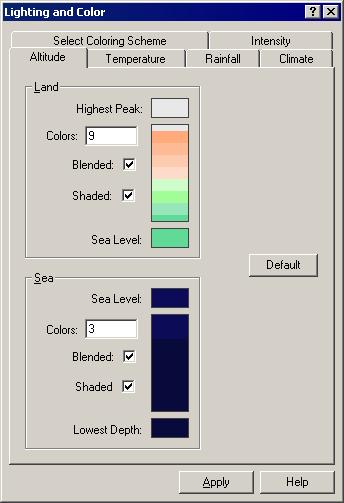
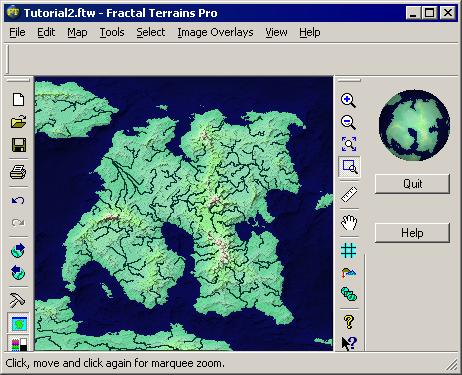
Image Climate Shader
The image climate shader replaces a single color value lookup such as altitude, temperature, or rainfall with a two-dimensional lookup based on rainfall and temperature (which is what determines the expected climate type). You’ll need an image. I like to use one that I made years ago that has samples of various climate types from satellite images.
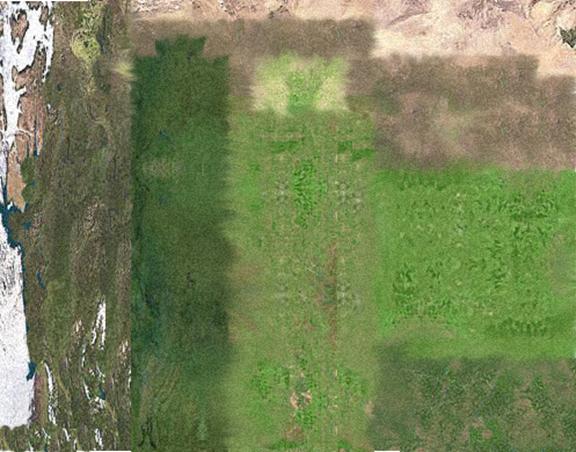
It’s not great, but it’s good enough.
Map>>Show Other Shader>>Show Image Climate brings up the Alternate Climate Coloration Dialog.
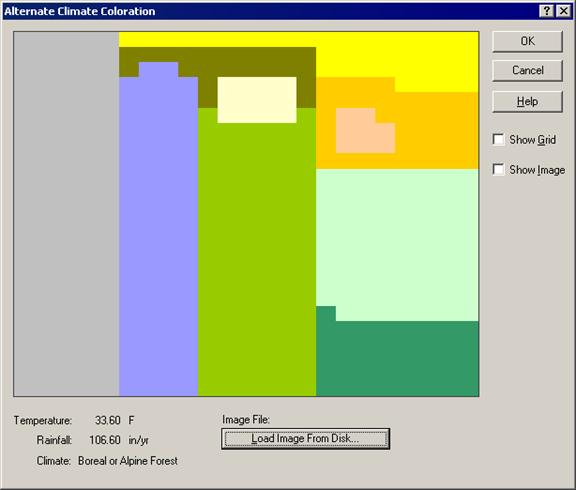
Load the image and click OK to see the shader applied.

Add A Graticule
A graticule will help add a little context and make it easier to figure out where to put deserts (they go around 35 degrees north and south latitude)
Map>>Grid Settings gets the Grid Settings dialog. Click Add to add a grid and bring up its editing dialog (also called Grid Settings). Enable the grid and set the color to white.
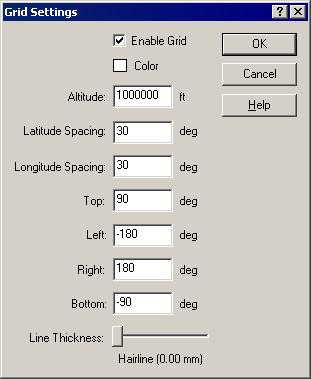
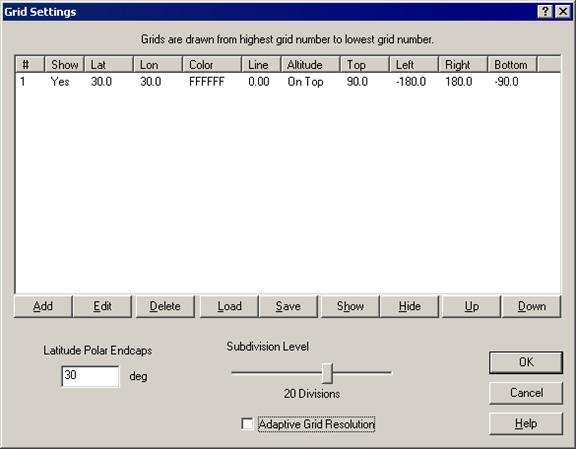
Adaptive grid resolution works for the most part, but it has problems once in a while. It’s usually not a problem to just force a manual subdivision level.
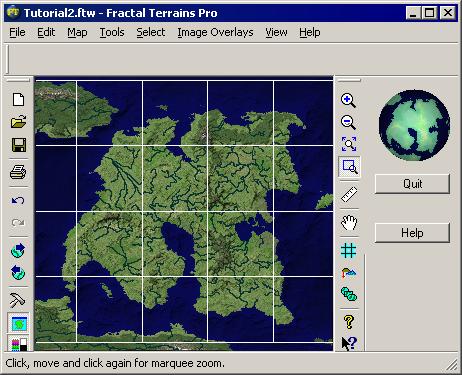
Click OK and enjoy the pretty white grid.
Adjusting Climates
The results look acceptable, but deserts and ice-clad mountains would look better. Use the Tools>>Paint Lower>>Rainfall and Tools>>Paint Lower>>Temperature to get the desired effect. Remember, big tools and a light touch.
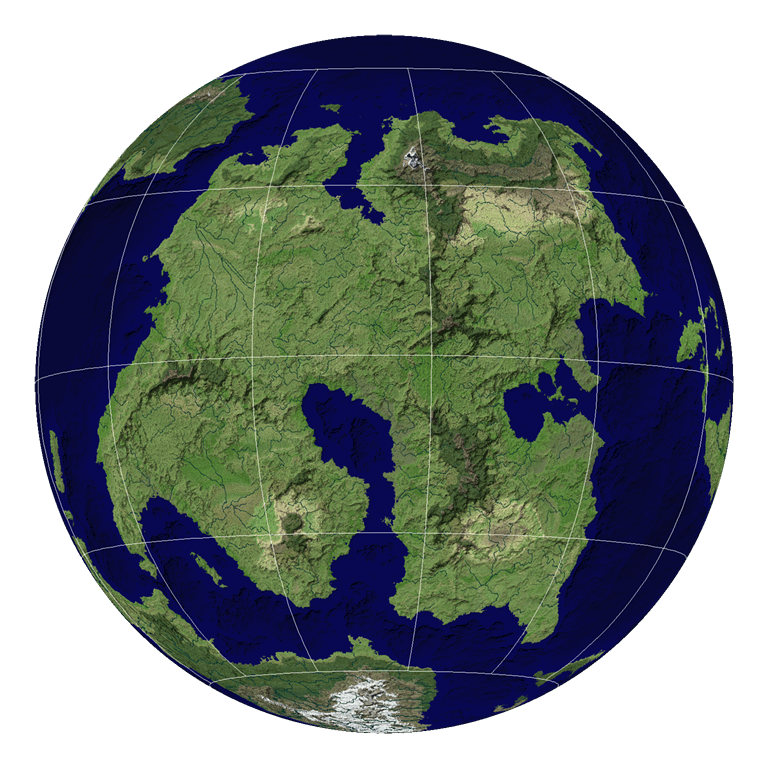
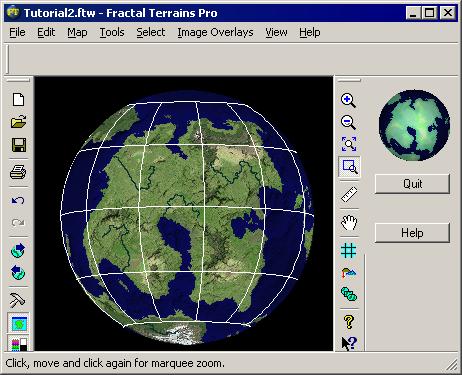
Select a projection for presentation
The equirectangular projection (properly Plate Caree) is excellent for editing with FT, but it has lots of unfortunate properties such as distortions of area and distance. But we’re after something pretty here so we’ll make it look like a globe. That’s the Orthographic projection. Map>>Projection brings up the projection dialog. We want to see the whole globe, so click the little “Fit” button above the map area on the dialog. Click and drag on the little map to get it to show the part you want, then set the scale to 1.1 to give a little border.

Export the world
Export the world at a bit bigger than you intend to use. File>>Save As and select Windows Bitmap as the type to avoid compression artifacts. PNG would also work.
Final Postprocessing.
I used Photoshop to trim off the external bits and reduce the size of the image to get the final result.
Total Effort
I completed this project in about two and a half hours, during which time I watched TV, cooked and ate dinner, and played with the dogs running around my feet. There was probably about an hour and a half total effort.